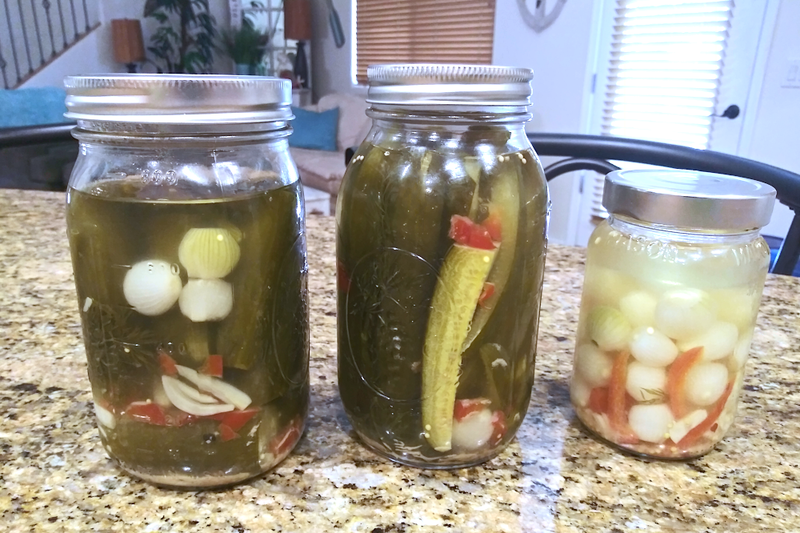
A lot has changed over the last few years. I guess you could say, I've cultivated my culinary skills. Have I become domesticated??? 👀 Perhaps a little. With all the craziness going on in the world, I hunkered down a bit more than usual and deep dived into sustainability. I planted a patio garden, started crochetting again, learned how to ferment foods and began making a lot of things from scratch, like granola, chips, breads, jams, ice cream, salad dressings, sauces, soups and condiments. I even make my own household cleaning and body products. Not only has this saved money, but I know EXACTLY what I'm ingesting now.
It is ridiculously inconvenient and time-consuming to go to the grocery store and have to read labels to find the cleanest, purest, least-modified foods available. I know, I've been doing it for years! However, with the amount of chemicals we are being inundated with, it's an unfortunate but necessary task, especially if we're not cooking from scratch. Hopefully this will all change for the better soon, but until then, I thought I would share with you how truly simple it is to ferment foods and the huge health perks gained when adding them to our everyday diet.
Fermentation is an age-old food preparation process that prolongs the freshness of many types of foods. When a food is fermented, it is left to sit and steep until the natural sugars and carbs interact with bacteria, yeast and microbes, which changes the chemical structure of the food. Some popular fermented (or “cultured”) foods include yogurt, cheeses, pickles, sauerkraut, wine, kifer, kombucha, sourdough and kimchi. Some people believe fermenting is even better than canning, since the canning process requires heating up the jars of food, which can kill off some of their beneficial nutrients. I just know that it's way easier to make large batches of fermented foods to have on hand in my refrigerator, that keep quite a long time due to the beneficial bacterias they contain.
Did you know that eating fermented foods is the most convenient way to get a daily dose of probiotics? Here are just some of the ways these foods benefit our overall health:
- Improves digestion and cognitive function
- Boosts immunity
- Treats irritable bowel syndrome (IBS)
- Provides minerals that build bone density
- Relieves allergies
- Kills harmful yeast and microbes
- They even help our mood
As well, the compounds within fermented foods have anti-microbial and anti-carcinogenic properties, plus bioactive peptides that exhibit anti-oxidant, anti-allergenic and blood pressure lowering effects.
Isn't this great? Are you ready to learn just how easy the fermenting process is?
If so, try my recipe below to ferment crisp & delicious dill pickles.
Fermented Dill Pickle Recipe 🥒
1. Wash 2 bags of pickle cucumbers and cut off the blossom end (the end without the stem) of each cucumber. You may slice cucumbers into chunks, spears or leave whole.
2. In a clean 1/2 gallon mason jar, add a few sprigs of fresh dill to the bottom.
3. Add a couple cloves of garlic, pearl onions (optional), then add several cucumbers.
4. Keep adding a little more dill, garlic, onions and cucumbers as you go along, until jar is filled.
5. Add a couple bay leaves (this keeps the pickles crispy).
6. For spicier pickles you can also toss in some chopped red peppers or flakes, mustard seeds, black peppercorns or whatever you wish.
7. In a separate jar or container about the same size, fill with non-chlorinated water and 2 1/2 tablespoons of Redmonds salt or pink Himalayan salt (not iodized salt). Stir well and pour over your cucumbers until jar is filled to about 1“ from top rim.
8. Add a glass weight and fermentation burp lid. (You can find these online).
9. Set jar on a plate or pan, and place somewhere dark, like a cupboard or pantry, for 2 weeks.
10. Remove burp lid and glass weight, screw on the original mason jar lid, and place in refrigerator.
You can make tomato sauce, catsup, salsa, sauerkraut, kimchi, cinnamon apples and so much more, and some only take 2-3 days to ferment.
See, I told you it was easy!
Let food be thy medicine. Enjoy! ❤️
